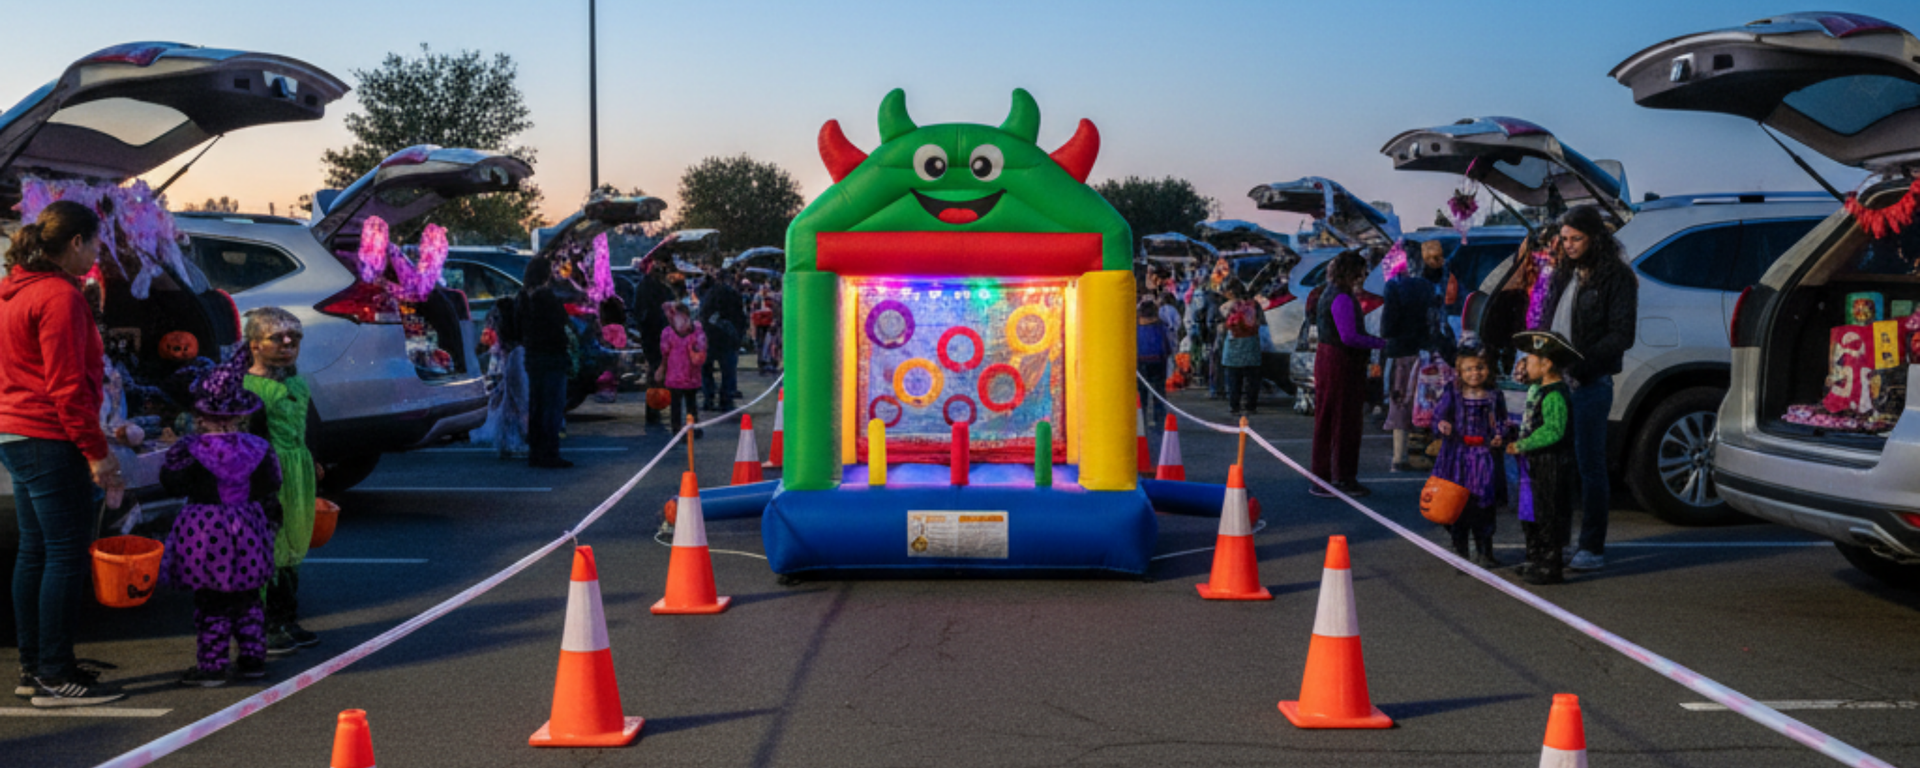
Planning a parking-lot Halloween event for a school, church, or community center? This guide shows you how to design a safe, high-turnout Trunk-or-Treat using compact inflatables. You’ll get space and power requirements, safety and staffing checklists, layout templates, and ROI ideas so your event looks professional and runs smoothly.
Shop In-Stock inflatables → | Browse Inflatable Games → | See Obstacle Courses →
Why Trunk-or-Treat still wins in 2025
Safety + convenience. Parents love the controlled environment, clear lighting, and predictable routes. Organizers love that the footprint is modular and scales to any lot size. Compact inflatables add color, energy, and photo-worthy moments without overwhelming the space or requiring a full field.
High engagement. Short ride/play cycles mean kids get turns quickly. That leads to more smiles, better photos, and positive word of mouth for your school or ministry.
Who this guide is for
- School PTOs/PTAs that need a safe, controlled Halloween alternative.
- Churches hosting outreach nights with family-friendly activities.
- Community centers & HOAs coordinating neighborhood events.
- Event rental operators providing compact inflatables and on-site staffing.
4-week timeline: from idea to event night
Week 4: Scope & permits
- Pick a target date/time window (dusk start; 2–3 hours).
- Confirm lot availability and any city/school permits if required.
- Decide on 1–3 compact inflatables based on space and power.
- Book equipment and verify delivery windows.
Week 3: Layout & safety plan
- Map the lot (entry, trunk lanes, inflatable zone, photo corner, exits).
- Reserve staff/volunteers; assign roles and shifts.
- Draft signage: rules, directional arrows, queue markers.
Week 2: Promotion & logistics
- Publish event page; add RSVP or free tickets to estimate turnout.
- Push announcements across email, social, and local groups.
- Confirm power plan (outlets vs. generator), cable covers, sandbags.
Week 1: Final checks
- Receive gear; test blowers; prepare extension cords and gaffer tape.
- Print rules and waivers (if your policy requires them).
- Assign “floater” staff to handle lines and quick fixes.
Parking-lot checklist (space, power, safety)
Space & surface
- Choose a flat, debris-free area. Sweep if needed.
- Keep 2–4 ft of clear perimeter around each unit for queues and supervision.
- Use sandbags on hard surfaces; stake only where permitted.
Power
- Most compact units run on one blower. Check each product spec.
- If using a generator: place at a safe distance, run cords with cable protectors, and never block exits.
- Test GFCI outlets when available and avoid daisy-chaining multiple power strips.
Safety
- Follow manufacturer rules: capacity, height/age, and constant adult supervision.
- Post visible rules signage and designate clear entry/exit points.
- Have a simple weather plan (wind thresholds, rain covers, shutdown procedure).
Best small-footprint inflatables for lots
Parking lots reward fast-cycle, compact attractions that keep lines moving and don’t sprawl across lanes. Start with these categories:
- Interactive & Games — quick turns, high smiles per minute. See Inflatable Games →
- Compact Jumpers (11×11 or 13×13) — ideal for younger kids and narrow footprints. Check In-Stock →
- Short Obstacle Sections — “mini” segments deliver energy without eating space. Browse Obstacle Courses →

Layouts that keep lines moving
Work backward from your expected headcount. The goal is continuous, safe flow with minimal cross-traffic.
Single-lane layout (most common)
- Entry: welcome table with wristbands or stamps; QR code for schedule and rules.
- Trunk lane: decorated cars forming a U-shape; cones define queue paths.
- Inflatable zone: one compact unit centered or at lane end; staff controls the line.
- Photo corner: simple backdrop for family shots; sponsor banner if applicable.
- Exit: clearly marked path back to parking.
Dual-lane layout (larger lots)
Mirror the trunk lanes with the inflatable zone centered between them. Add a second compact game to halve wait times.

Staffing & operations (smooth flow)
- Operator at each inflatable: enforces rules, manages turns, watches anchors and cables.
- Greeters at entry: answer questions, maintain capacity, hand out maps or candy rules.
- Floaters (2 people): handle rest breaks, line surges, and quick fixes (sandbag, cord cover).
- Lighting lead (evening events): switches on perimeter lighting at dusk and checks visibility.
- Clean-up crew with trash/recycle plan and final sweep after teardown.
Promotion & turnout boosters
- Create a short event page with time, map, parking, and a photo of the inflatable.
- Post to Facebook Groups, school/church newsletters, and local calendars two weeks out.
- Use a countdown on social the final 5 days; share setup photos on event day.
- Provide photo-op signage (e.g., “Thanks for coming!”) near the backdrop—no text on the product images to keep them reusable.
- Offer a simple raffle or candy passport to encourage visiting every trunk and reduce crowding spikes.
Budget & ROI for organizers
Even one compact inflatable can meaningfully raise perceived quality and attendance. Consider:
- Equipment (rental or purchase), delivery, and staffing.
- Signage & lighting (cones, flood lights, cable covers).
- Insurance & permits if required by your district or municipality.
- Sponsorships: invite local businesses to underwrite the inflatable or photo corner in exchange for logo placement on printed signs or the event page.
FAQs
What inflatable sizes work best for parking lots?
Look for 11×11 or 13×13 jumpers and single-blower interactive games. They fit narrow footprints and keep lines moving.
How many blowers or generators do I need?
Most compact units run on one blower. If you need a generator, place it at a safe distance, route cords with protectors, and avoid tripping paths.
Can we run the inflatable after dark?
Yes—add perimeter lighting, reflective cones, and an extra staffer to supervise queues and visibility.
What safety rules should be posted?
Age/height limits, capacity, socks/no-shoes rules, and operator instructions (one rider at a time when applicable). Keep the sign readable at night.
How do we handle rain or wind?
Set a clear weather policy with thresholds from the manufacturer’s manual. If conditions are unsafe, shut down and communicate promptly.

